How to Add Printer Bleed?
Time:2024-08-16
Views:374
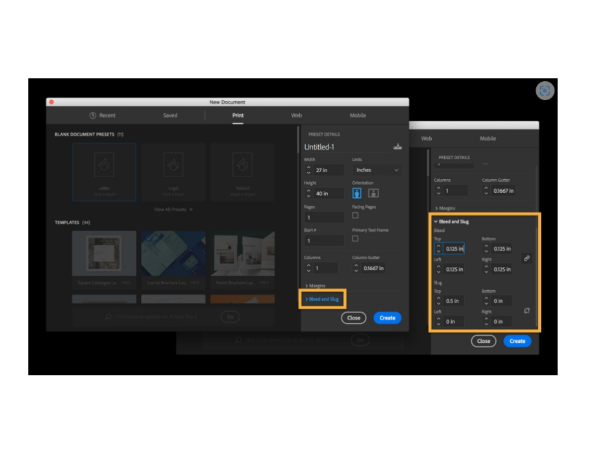
How to Add Printer Bleed in InDesign?Adding printer bleed to your documents in InDesign is straightforward. Follow these steps to ensure your documents look professional and are printed correctly:
1.Open the document in InDesign.
2.Select the ‘File’ menu, and then select "Document Setup".
3.In the ‘Bleed and Slug‘ section, enter a value of 3mm (0.125 inches) or higher for all four options (Top, Bottom, Left, Right). This defines how far elements should extend beyond the page edges before being cut.
4.Click ‘OK‘ to set up your bleed values.
5.Create or move elements so they are at least 3mm (0.125 inches) away from all four edges of the artboard/page size (excluding objects bleeding outside). If space constraints prevent this, consider shrinking the element or substituting a different one.
6.When satisfied with your design, export it as a PDF/X-1a file to ensure your bleeds are recognized in the print-ready PDF.


